投稿日: 2024年7月3日 IOT再びーーーESP32編(3)ーSPIFFS不可

前掲の諸兄のスケッチ眺めてみましたが,ハンドラーの部分の記述と,html の javascript の部分がいま
いちわかりません。youtbe をあれこれ検索していましたら,別の諸兄の記事がめにとまりました。この諸兄の
スケッチなら,私用に改変できそうです。諸兄は,超音波を使ってますが,超音波だと,タンクに穴を開ける
必要がある気がしますので,超音波は使わないで当初の予定のように水位センサーを使ってやります。
ひとまず,諸兄のプログラムのオリジナルをインストールしてみます。


ところが,ところが,インストールに必要な,プラグインをIDEに取り込めません。一日,あれこれやりまし
たがやっとできました。
原因は,arduino IDE のバージョンで,使っていたV2.**ではだめで,v1.**で,やっとできました。
これが,分かるのに丸一日,インストールしていたarduino IDE 関係のフォルダーも全削除して,何回か
インストール,つかれました。
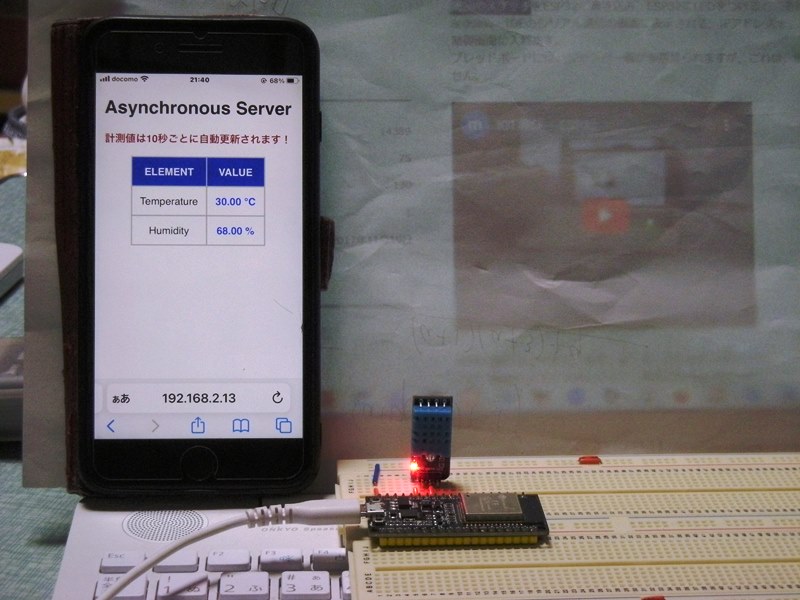
おかげで,やっと,下記の諸兄のスケッチをesp32に書き込み,テストできました。

// 必要なライブラリのインクルード
#include <WiFi.h>
#include <WebServer.h>
#include <SPIFFS.h>

// ピンの定義
#define trigPin 5 // 超音波センサのトリガーピン
#define echoPin 18 // 超音波センサのエコーピン

// WiFi接続情報
const char* ssid = "Your SSID";
const char* password = "Your Password";

// WebServerオブジェクトの初期化
WebServer server(80);

// セットアップ関数
void setup() {
  Serial.begin(115200); // シリアル通信の開始
  pinMode(trigPin, OUTPUT); // トリガーピンを出力として設定
  pinMode(echoPin, INPUT); // エコーピンを入力として設定

  // SPIFFSの初期化
  if(!SPIFFS.begin(true)){
    Serial.println("SPIFFSのマウントに失敗しました");
    return;
  }

  // WiFi接続
  WiFi.begin(ssid, password);
  while (WiFi.status() != WL_CONNECTED) {
    delay(500);
    Serial.print(".");
  }
  Serial.println("\nWiFi connected");
  Serial.print("IP Address: ");
  Serial.println(WiFi.localIP());

  // Webサーバーのルート設定
  server.on("/", HTTP_GET, []() {
    server.send(200, "text/html", SPIFFS.open("/index.html", "r").readString());
  });

  // '/distance'で距離を返す設定
  server.on("/distance", HTTP_GET, []() {
    server.send(200, "text/plain", String(measureDistance()));
  });

  server.begin(); // サーバーの開始
}

// メインループ
void loop() {
  server.handleClient(); // クライアントのリクエストを処理
}

// 距離測定関数
float measureDistance() {
  digitalWrite(trigPin, LOW);
  delayMicroseconds(2);
  digitalWrite(trigPin, HIGH);
  delayMicroseconds(10);
  digitalWrite(trigPin, LOW);
  long duration = pulseIn(echoPin, HIGH);
  float distance = (duration * 0.0343) / 2;
  return distance;
}


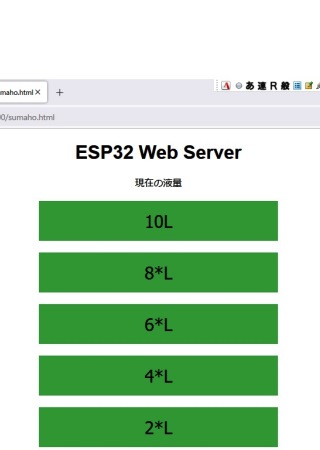
スケッチは簡単ですが,HP掲載用のhtmlとjavascritpがやっかいのようですが,これもあまり手を加えずに済みそうです。

<!DOCTYPE html>
<html>
<head>
    <meta charset="UTF-8">
    <title>水位計</title>
    <meta name="viewport" content="width=device-width, initial-scale=1">
    <script src="https://code.highcharts.com/highcharts.js"></script>
    <script src="https://code.highcharts.com/highcharts-more.js"></script>
    <script src="https://code.highcharts.com/modules/solid-gauge.js"></script>
    <style>
        body, html {
            margin: 0;
            padding: 0;
            width: 100%;
            height: 100%;
            display: flex;
            flex-direction: column;
            justify-content: center;
            align-items: center;
            font-family: Arial, sans-serif;
            font-size: 20px;
        }
        #container {
            width: 90%;
            height: 50%;
        }
        .settings {
            display: flex;
            justify-content: center;
            align-items: center;
            margin-bottom: 20px;
        }
        .settings > div {
            margin: 0 10px;
        }
        .alert {
            display: none;
            color: red;
            text-align: center;
            position: absolute;
            width: 100%;
            bottom: 10%;
        }
        #title {
            display: flex;
            justify-content: center;
            align-items: center;
            font-size: 50px;
        }
    </style>
</head>
<body>
    <div id="title">Water Level monitoring</div>
    <div class="settings">
        
        <div>
            <label for="minDistance">0% Distance (cm): </label>
            <input type="number" id="minDistance" value="2">
        </div>
        <div>
            <label for="maxDistance">100% Distance (cm): </label>
            <input type="number" id="maxDistance" value="15">
        </div>
    </div>
    <div id="container"></div>
    <div id="alert" class="alert">Alert: The value is below 20%</div>

    
    <script>
        var minDistance = parseFloat(document.getElementById('minDistance').value);
        var maxDistance = parseFloat(document.getElementById('maxDistance').value);

        document.getElementById('minDistance').addEventListener('change', function() {
            minDistance = parseFloat(this.value);
            updateChart();
        });

        document.getElementById('maxDistance').addEventListener('change', function() {
            maxDistance = parseFloat(this.value);
            updateChart();
        });


        // Highchartsのゲージオプション設定
        var gaugeOptions = {
            chart: {
                type: 'solidgauge',
            },
            title: null,
            pane: {
                startAngle: -120,
                endAngle: 120,
                background: {
                    backgroundColor: '#EEE',
                    innerRadius: '60%',
                    outerRadius: '100%',
                    shape: 'arc'
                }
            },
            tooltip: {
                enabled: false
            },
            yAxis: {
                stops: [
                    [0.1, '#DF5353'], // 高い値で青系
                    [0.5, '#DDDF0D'], // 中間値で黄色
                    [0.9, '#55BF3B']  // 低い値で赤系
                ],
                lineWidth: 0,
                minorTickInterval: null,
                tickAmount: 2,
                min: 0,
                max: 100,
                title: null,
                labels: {
                    y: 16
                }
            },
            credits: {
                enabled: false
            },
            series: [{
                name: 'Distance',
                data: [100], // 初期値
                dataLabels: {
                    format: '<div style="text-align:center"><span style="font-size:30px">{y}%</span></div>'
                }
            }]
        };

        // Highchartsのゲージを作成
        var chart = Highcharts.chart('container', Highcharts.merge(gaugeOptions, {
            series: [{
                data: [100] // シリーズにも初期値をセット
            }]
        }));

        // ゲージの値を更新する関数
        function updateGauge(value) {
            // minDistanceとmaxDistanceを使用して値を計算
            var newVal = ((maxDistance - value) / (maxDistance - minDistance)) * 100;
            
            // newValが0未満の場合は0に、100を超える場合は100に制限する
            newVal = Math.max(0, Math.min(newVal, 100));    
            newVal = Math.round(newVal); // 小数点以下を四捨五入して整数に
            chart.series[0].points[0].update(newVal);

            // 値が20以下の場合、アラートを表示
            if (newVal <= 20) {
                document.getElementById('alert').style.display = 'block';
            } else {
                document.getElementById('alert').style.display = 'none';
            }
        }

        // ESP32からデータを取得してゲージを更新する
        // HTML内のJavaScriptの一部
        // HTML内のJavaScriptの一部
        setInterval(function () {
            fetch('/distance')
                .then(response => response.text())
                .then(distance => {
                var dist = parseFloat(distance);
                updateGauge(dist); // ゲージを更新する関数に距離データを渡す
                })
                .catch(function (error) {
                console.error('Error fetching distance:', error);
                });
        }, 1000); // 1秒ごとに更新
    </script>
</body>
</html>

この諸兄のいいところは,スケッチにhtmlの部分を含めるのではなく,htmlは別途esp32にアップロードでき
るところでしょうか。そのため,デバックのために,htmlを抜き出す必要もなく,htmlをそのままデバックで
きます。

IOT再びーーーESP32編(2)

前回,とりあえず,諸兄のスケッチ動かしみました。
このスケッチのhtml部分を書き換え,下記ようにして,スケッチの方で,それぞれのLの帯を順次消していけ
ば,目的を達成できるかなと考えました。

ただ,これでは,問題があるようで,サーバー側で,新しい情報をクライアントの方に送っても,クライア
ント側で更新を行わないと,画面が新しくならないみたいなので,このままでは,つかえないかなとおもい
ました。

いろいろあさってると,「非同期処理」が必要だとのHPを見つけました。これを改変すれば,目的が達成でき
そうな気がしてきました。
このHPのスケッチをDLして,自分の環境に合わせて,動かしてみました。温度センサーは以前買った,
Sensor Kit for Aruduinoというセット

に入ってた物をつかいました。
写真の下にあるのが,写真のものを動かしている諸兄のHPにあった,スケッチです。
もっともここよりも諸兄のHPに全文がのっていますので,そちらからDLした方がいいでし
ょうか。


/*
 * File:      WiFiMeasureAsync.ino
 * Function:  計測デバイスを非同期Webサーバーにして、クライアント画面に計測値を更新表示
 *            させる。
 * Date:      2020/02/12
 * Author:    M.Ono
 * 
 * Hardware   MCU:  ESP32 (DOIT ESP32 DEVKIT V1 Board)
 *            ブレッドボードに上記開発ボードと温湿度センサー、プッシュボタン、LEDを配線
 *            温湿度センサーはDHT11 
 *            ※今回はプッシュボタンとLEDは使用しない。
 */
 
#include <arduino.h>
#include <WiFi.h>
#include <ESPAsyncWebServer.h>
#include <DHT.h>                    // DHTセンサー用


/* Function Prototype */
String getTemperature();
String getHumidity();
String processor(const String&);
void doInitialize();
void connectToWifi();

// ルーター接続情報
#define WIFI_SSID "aterm-e4b126-g"
#define WIFI_PASSWORD "3d259dac2f80e"

/* 基本属性定義  */
#define SPI_SPEED   115200          // SPI通信速度
#define DHTTYPE     DHT11           // DHTセンサーの型式

// Webサーバーオブジェクト
#define HTTP_PORT 80
AsyncWebServer server(HTTP_PORT);

/* DHTセンサー*/
const int DHTPin = 14;                  // DHTセンサーの接続ピン
DHT   dht(DHTPin, DHTTYPE);             // DHTクラスの生成(初期化?)

/* HTMLページ */
const char* strHtml = R"rawliteral(
 <!DOCTYPE HTML>
 <html>
 <head>
 <meta charset="utf-8">
 <meta name="viewport" content="width=device-width, initial-scale=1">
 <style>
html { font-family: Helvetica; display: inline-block; margin: 0px auto;text-align: center;}
h1 {font-size:28px;}
body {text-align: center;}
table { border-collapse: collapse; margin-left:auto; margin-right:auto;}
th { padding: 12px; background-color: #0000cd; color: white; border: solid 2px #c0c0c0;}
tr { border: solid 2px #c0c0c0; padding: 12px;}
td { border: solid 2px #c0c0c0; padding: 12px;}
.value { color:blue; font-weight: bold; padding: 1px;}
 </style>
 </head>
 <body>
 <h1>Asynchronous Server </h1>
 <p style='color:brown; font-weight: bold'>計測値は 10 秒ごとに自動更新されます! </p>
 <p> <table>
 <tr> <th>ELEMENT </th> <th>VALUE </th> </tr>
 <tr> <td>Temperature </td> <td> <span id="temperature" class="value">%TEMPERATURE%
 </span> <tr> <td>Humidity </td> <td> <span id="humidity" class="value">%HUMIDITY% </span>
 </td> </tr>
 </table> </p>
 </body>
 <script>
var getTemperature = function () {
var xhr = new XMLHttpRequest();
xhr.onreadystatechange = function() {
if (this.readyState == 4 && this.status == 200) {
document.getElementById("temperature").innerHTML = this.responseText;
}
};
xhr.open("GET", "/temperature", true);
xhr.send(null);
}
var getHumidity = function () {
var xhr = new XMLHttpRequest();
xhr.onreadystatechange = function() {
if (this.readyState == 4 && this.status == 200) {
document.getElementById("humidity").innerHTML = this.responseText;
}
};
xhr.open("GET", "/humidity", true);
xhr.send(null);
}
setInterval(getTemperature, 10000);
setInterval(getHumidity, 10000);
 </script>
 </html>)rawliteral";

/*****************************************************************************
 *                          Predetermined Sequence                           *
 *****************************************************************************/
void setup(){
    doInitialize();             // 初期化処理をして
    connectToWifi();            // Wi-Fiルーターに接続する

    // GETリクエストに対するハンドラーを登録して
    server.on("/", HTTP_GET, [](AsyncWebServerRequest *request){
        request->send_P(200, "text/html", strHtml, editPlaceHolder);
    });
    server.on("/temperature", HTTP_GET, [](AsyncWebServerRequest *request){
        request->send_P(200, "text/plain", getTemperature().c_str());
    });
    server.on("/humidity", HTTP_GET, [](AsyncWebServerRequest *request){
        request->send_P(200, "text/plain", getHumidity().c_str());
    });
    // サーバーを開始する
    server.begin();
}
 
void loop(){
}

/* 計測処理ロジック */
String getTemperature() {
    float t = dht.readTemperature();
    if (isnan(t)) {    
        Serial.println("Failed to get temperature!");
        return "--";
    }
    else {
        Serial.println(t);
        return String(t) + " ℃";
    }
}

String getHumidity() {
    float h = dht.readHumidity();
    if (isnan(h)) {
        Serial.println("Failed to get humidity!");
        return "--";
    }
    else {
        Serial.println(h);
        return String(h) + " %";
    }
}

/* プレースホルダー処理 */
String editPlaceHolder(const String& var){
    if(var == "TEMPERATURE"){
        return getTemperature();
    }
    else if(var == "HUMIDITY"){
        return getHumidity();
    }
    return "??";
}

/* 初期化処理 */
void doInitialize() {
    Serial.begin(SPI_SPEED);
    dht.begin();                       // DHTセンサーを起動
}

/****************************< Connect functions >****************************/
/* Wi-Fiルーターに接続する */
void connectToWifi() {
    Serial.print("Connecting to Wi-Fi ");
    WiFi.begin(WIFI_SSID, WIFI_PASSWORD);
    while (WiFi.status() != WL_CONNECTED) {
        delay(500);
        Serial.print(".");
    }
    Serial.println("");
    // モニターにローカル IPアドレスを表示する
    Serial.println("WiFi connected.");
    Serial.print("  *IP address: ");
    Serial.println(WiFi.localIP());
    server.begin();
}

  }
}

IOT再びーーーESP32編

何年か前に,raspberry Pi を使って,スマホから,LED の制御を実験しました。

このと時は,raspberry Pi のプログラムが良く分からないところもあったので,結構手間がかかりました。
あることがやりたくで,再びIOTに挑戦することにしました。

手始めに,ESP32を使って,wify経由でのLチカです。

諸兄のスケッチをESP32に書き込み,ESP32にLEDをつけると,それほど手間がかからずにできます。
arduino・IDEのシリアル通信の画面に表示される,IPアドレスを,スマホのブラウザに打ち込むと,動画の
制御画面に入れます。
ブレッドボードには,ジャンパー線が多数見られますが,これは,前回までの作業の名残で,片付けていま
せん。


反応が鈍いようですが,多分,ルーターのためだと思います。
この,動画のスケッチをいじって,あれこれやる予定です。

/*********
  Rui Santos
  Complete project details at https://randomnerdtutorials.com  
*********/
// Load Wi-Fi library
#include <WiFi.h>
// Replace with your network credentials
const char* ssid = "REPLACE_WITH_YOUR_SSID";
const char* password = "REPLACE_WITH_YOUR_PASSWORD";
// Set web server port number to 80
WiFiServer server(80);
// Variable to store the HTTP request
String header;
// Auxiliar variables to store the current output state
String output26State = "off";
String output27State = "off";
// Assign output variables to GPIO pins
const int output26 = 26;
const int output27 = 27;
// Current time
unsigned long currentTime = millis();
// Previous time
unsigned long previousTime = 0; 
// Define timeout time in milliseconds (example: 2000ms = 2s)
const long timeoutTime = 2000;
void setup() {
  Serial.begin(115200);
  // Initialize the output variables as outputs
  pinMode(output26, OUTPUT);
  pinMode(output27, OUTPUT);
  // Set outputs to LOW
  digitalWrite(output26, LOW);
  digitalWrite(output27, LOW);

  // Connect to Wi-Fi network with SSID and password
  Serial.print("Connecting to ");
  Serial.println(ssid);
  WiFi.begin(ssid, password);
  while (WiFi.status() != WL_CONNECTED) {
    delay(500);
    Serial.print(".");
  }
  // Print local IP address and start web server
  Serial.println("");
  Serial.println("WiFi connected.");
  Serial.println("IP address: ");
  Serial.println(WiFi.localIP());
  server.begin();
}
void loop(){
  WiFiClient client = server.available();   // Listen for incoming clients

  if (client) {                             // If a new client connects,
    currentTime = millis();
    previousTime = currentTime;
    Serial.println("New Client.");          // print a message out in the serial port
    String currentLine = "";                // make a String to hold incoming data from the client
    while (client.connected() && currentTime - previousTime <= timeoutTime) {  // loop while the client's connected
      currentTime = millis();
      if (client.available()) {             // if there's bytes to read from the client,
        char c = client.read();             // read a byte, then
        Serial.write(c);                    // print it out the serial monitor
        header += c;
        if (c == '\n') {                    // if the byte is a newline character
          // if the current line is blank, you got two newline characters in a row.
          // that's the end of the client HTTP request, so send a response:
          if (currentLine.length() == 0) {
            // HTTP headers always start with a response code (e.g. HTTP/1.1 200 OK)
            // and a content-type so the client knows what's coming, then a blank line:
            client.println("HTTP/1.1 200 OK");
            client.println("Content-type:text/html");
            client.println("Connection: close");
            client.println();
            
            // turns the GPIOs on and off
            if (header.indexOf("GET /26/on") >= 0) {
              Serial.println("GPIO 26 on");
              output26State = "on";
              digitalWrite(output26, HIGH);
            } else if (header.indexOf("GET /26/off") >= 0) {
              Serial.println("GPIO 26 off");
              output26State = "off";
              digitalWrite(output26, LOW);
            } else if (header.indexOf("GET /27/on") >= 0) {
              Serial.println("GPIO 27 on");
              output27State = "on";
              digitalWrite(output27, HIGH);
            } else if (header.indexOf("GET /27/off") >= 0) {
              Serial.println("GPIO 27 off");
              output27State = "off";
              digitalWrite(output27, LOW);
            }
            
            // Display the HTML web page
            client.println("<!DOCTYPE html><html>");
            client.println("<head><meta name=\"viewport\" content=\"width=device-width, initial-scale=1\">");
            client.println("<link rel=\"icon\" href=\"data:,\">");
            // CSS to style the on/off buttons 
            // Feel free to change the background-color and font-size attributes to fit your preferences
            client.println("<style>html { font-family: Helvetica; display: inline-block; margin: 0px auto; text-align: center;}");
            client.println(".button { background-color: #4CAF50; border: none; color: white; padding: 16px 40px;");
            client.println("text-decoration: none; font-size: 30px; margin: 2px; cursor: pointer;}");
            client.println(".button2 {background-color: #555555;}</style></head>");
            
            // Web Page Heading
            client.println("<body><h1>ESP32 Web Server</h1>");
            
            // Display current state, and ON/OFF buttons for GPIO 26  
            client.println("<p>GPIO 26 - State " + output26State + "</p>");
            // If the output26State is off, it displays the ON button       
            if (output26State=="off") {
              client.println("<p><a href=\"/26/on\"><button class=\"button\">ON</button></a></p>");
            } else {
              client.println("<p><a href=\"/26/off\"><button class=\"button button2\">OFF</button></a></p>");
            } 
               
            // Display current state, and ON/OFF buttons for GPIO 27  
            client.println("<p>GPIO 27 - State " + output27State + "</p>");
            // If the output27State is off, it displays the ON button       
            if (output27State=="off") {
              client.println("<p><a href=\"/27/on\"><button class=\"button\">ON</button></a></p>");
            } else {
              client.println("<p><a href=\"/27/off\"><button class=\"button button2\">OFF</button></a></p>");
            }
            client.println("</body></html>");
            
            // The HTTP response ends with another blank line
            client.println();
            // Break out of the while loop
            break;
          } else { // if you got a newline, then clear currentLine
            currentLine = "";
          }
        } else if (c != '\r') {  // if you got anything else but a carriage return character,
          currentLine += c;      // add it to the end of the currentLine
        }
      }
    }
    // Clear the header variable
    header = "";
    // Close the connection
    client.stop();
    Serial.println("Client disconnected.");
    Serial.println("");
  }
}

このスケッチを改変するにあたって,これまた,丁寧に解説なさってる諸兄がいらっしゃいました。
おかげで,スケッチの構造がやっとおぼろげながら分かってきました。

芝刈りーー今年第7回目

今年,7回目の芝刈りです。大分のびが早くなってきました.刈り取った芝も,ゴミ袋約一袋になりました。


ほぼ,緑になってきましたが,所々,茶色が濃い部分があります。サッチをとるときに,いためてしまった
のか,病害虫かはちょっと不明です。ちょうどへこんでいるところでもあるので,目土を後でいれたいと思
います。
前回から約二週間と間が少しあいてしまいました。部分的に,軸刈りに近い部分ができました。

芝生の手入れーーアリ駆除編

今年は,草取り,芝刈りと結構時間がとれたので,例年になく芝生の状態はいいようですが,アリが何カ所か
に巣を作って,土をもりあげています。

写真では良く分かりませんが,動画では,動き回るアリが良く分かります。

どうも,土を盛り上げてしまうので,駆除の薬剤を購入して,対策したいと思います。

多分ーー落葉病ーー柿ーー2

薬剤を散布しましたが,それほど急に効き目はあるとはおもいませんが,落ちる葉の数がやや少なくなったよ
うに思います。

梅雨に入ってしまいましたが,梅雨明けにでも,届いた展着剤をいれて,再度,薬剤を散布しようと思います。

多分ーー落葉病ーー柿

柿の葉が落ちるようになりました。
いろいろ調べると,どうも,落葉病という,病気みたいです。
バラの,黒点病のように,葉が黒くなります。黒くなった後,赤っぽくなって,落ちてしまいます。


ネットには,あまり対策がありませんでしたが,ベンレート水和剤がいいとの記述もあったので,ダメ元で本
日散布いたしました。

散布後,取説を良く読んでみると,溶剤を作るとき,展着剤をいれないとだめなようで,慌てて,
注文しました。

芝刈りーー今年第6回目

6回目の芝刈りです。今年は,まめに芝刈りをしているので,刈り取る芝の量は毎回それほど多くありませ
ん。最盛期になると,もう少し多くなります。


写真の加減で,緑がまばらに見えますが,実際はもう少し,緑がきれいになってます。

除草剤ーーー2

過日まいた除草剤,効き目が現れはじめました。葉の色が変わってきました。これ,根っこまで,かれてくれ
ると後がいいのですが。


場合によっては,追加で除草剤まいてみたいと思います。